Showing posts with label re-purpose. Show all posts

Friday, June 12, 2015

The New and Improved Bee Bling Hat

I'm loving my bee hat v2.0. I loved the screen print of our apiary logo & the patch with the alternating blanket stitches. Then I went for the bling. My first attempt was rather meh. Just not taking it to the level I wanted. Then I was introduced to blingy Olive & Pique hats, and my vision was focused.  I went rhinestone shopping on EBay (best craft store ever) and bought a mix bag selection of sew on stones.
I had been wanting to try my new bead foundation material for a while & this seemed to be the perfect starter project. I'm not an expert beader, but I can do enough to be dangerous. Having the foundation and the rhinestones really cleaned up my beading & I love the results.
My selection of sew on rhinestones
I just made up my pattern of random stitching here


steps of the refab... removing the old beading, taping off the sections to be painted & the stenciling with gold paint

The finished result from my first attempt to the revamped version

Wednesday, June 10, 2015

Spurs Wreath version 2.0

Ok, so you may not remember, but way back when I made a sad little Rag-a-Muffin wreath using scraps of t-shirt.
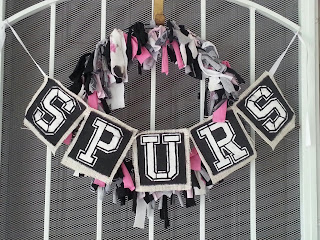
The Original Rag-a-Muffin wreath

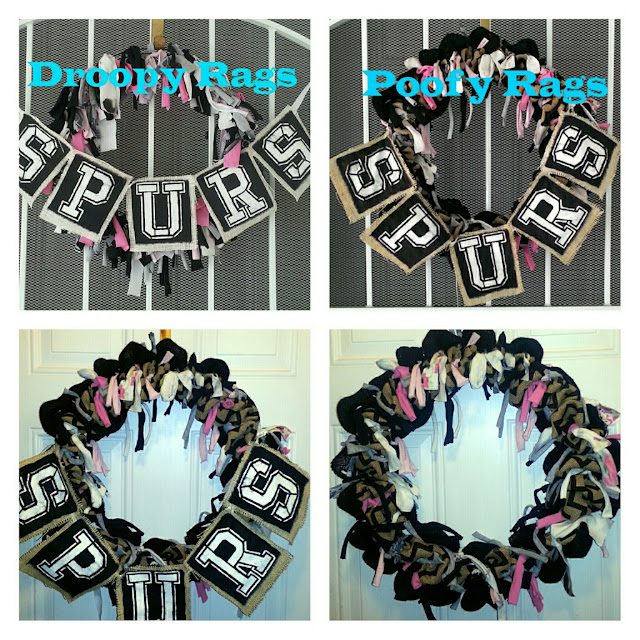
Well, it didn't take long in the San Antonio humidity for those t-shirt scraps to go limp. So instead of a Rag-a-Muffin look, I got a drowned rat look. Not really what I was wanting. I finally got off my bum & decided to fix it. 

Step 1: I took it all off & down to the bare bones (or wire frame in this case). I also purchased some burlap ribbon from the craft store. I had a 1/2 roll of black tulle as well, but in the end I opted not to use it.

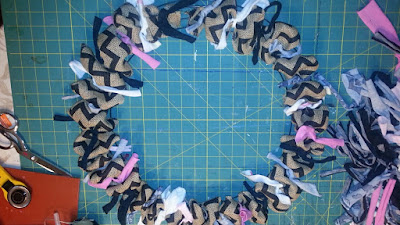
Step 2: I began by tying the chevron burlap to the center 2 rings. Being my first burlap wreath ever, I did my research, and watched some YouTube videos on how to make burlap wreaths. They all seemed to recommend a type of tuck and twist method. I really wasn't comfortable with that because it didn't seem secure, and when I tried it, mine was definitely NOT secure. But since I was going to reuse my t-shirt ties, I just decided to tie my burlap in place.  I invented my soon to be world famous "Pucker-and-Tie Method" :-)
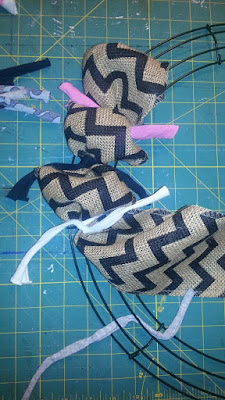
Pucker and tie method

Puckered and tied all the way around (you can see the gap of the ends at the top of the photo)

Use the Pucker and Tie Method: I began by tying a short end, create a ripple or pucker with the ribbon and tie - create a pucker and tie - so on and so on until I got all the way around to my starting point and tied the last end. I had just enough ribbon to go around the wreath once. My two ends are just sitting right next to each other, which did leave a small gap, but once I was done I was able to squish them together & now you can't even see the gap. I was actually thinking that if you were to put a flower or bow or something, you would actually want that gap there.

Step 3: I began tying my solid black burlap ribbon to the inner and outer rings. I had more of this ribbon so I was able to go around both with no problem. Same method - pucker and tie.
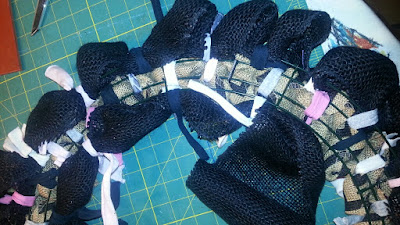


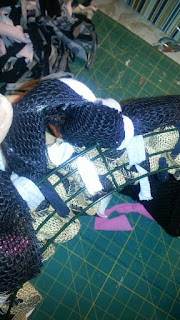
The back of the frame looks like this
Step 4: Once I had all my burlap ribbon tied in place, I started filling in random areas with more t-shirt ties. I think my t-shirt ties were around 1" x 6" pieces (give or take on the length)
Tie extra pieces where ever you find gaps

Step 5: Hang on a wreath hanger hook
Step 6: Add my Spurs Banner Flags
All done! From droopy to poofy - in about 30 minutes (Well, 30 minutes once I had an empty frame to work from. Un-knotting all those little buggers took some time - and fingernails)


Friday, May 29, 2015

Fastest Men's Shirt Refashion in the West

This is so quick & easy it's ridiculous!

  1. Pick a men's shirt that's a size or two larger than you
  2. Using your sharp fabric scissors (Ginghar's y'all - worth the money), cut off the collar just above the collar stand, and the cuffs just above the cuff
  3. Roll the cuffs up about 3 times (stitch in place if desired), put on your shirt and tie the bottom ends in a knot
DONE. Show off to the cats.
Cut on the Red lines


Friday, May 23, 2014

Rag-a-muffin Spurs Wreath

Using the strips of scraps from my Spurs t-shirt project, I made a wreath. I used a wire wreath foundation that I had on hand, but you can use anything else that allows you to tie on the scraps.

My scraps are about 1.5"x6"-7" each & I just started tying them randomly around the form by color. Even with the "finished" product... I think I will keep adding scraps as I come across fabric re-uses, just to fatten it up.


I had originally intended to stretch the banner across the wreath from side to side, but as I started making my banner flags to match the size of my stencils I just went ahead & kept them separate. Maybe later on I'll do smaller letters on for the wreath & stretch the banner some place else, but for now, I like this arrangement.

Go Spurs Go!


Go SPURS Go

I really needed to do something with all my old Spurs t-shirts that I don't wear or don't fit into anymore. So I decided I would cut them up & make a patch work maxi skirt. I also included some other t-shirts that I don't wear that I thought would go nicely with my black, white, gray and pink theme.
I decided on a 16" square for all my pieces. Some shirts proved a bit small for 16", but I made it work. Now...just cutting everything up took a while, but left me with a bunch of usable scraps. I cut the shirt bottoms into strips about 1.5"x6"-7", and will use the sleeves to make small drawstring bags.


I anticipate 3 projects from this reincarnation.
  1. Patchwork Maxi Skirt
  2. Rag-a-muffin Wreath
  3. Cutesy Drawstring Bags
I don't know when I'll get the time to it all, but at least I have a plan