Wednesday, July 6, 2022

A little Steampunk-y Queen Bee

 2nd hand fabric and trim make up the key elements to my Queen Bee costume. I used McCalls M6911 for the bustle, and self-patterned the caplet. I traced out my pattern pieces onto the yellow fabric and then stenciled the stripes and lace design using speedball ink (set with a hot iron after it dried) -- then I sewed it. The lining is a black polyester with yellow polka dots - also purchased at a thrift store. The wings are my own design that I made in PhotoShop and uploaded to Spoonflower.


Click here for wings fabric: https://www.spoonflower.com/designs/12305010-simple-beewing-10-inch-by-katra_craft

I used rolled hem foot to hem all around the wings, and simply attached them to my capelet. I also sewed fishing weights into the points in the front of my capelet to keep the fabric weighted forward & not pulling backwards by the weight of the wings.

The crown is craft foam & antennae are pipe cleaners - both stitched & glued on to a fabric headband. Very lightweight & comfortable to wear all day. 

Because I'm too lazy to type... image dump of some details ...


Wednesday, October 19, 2016

Easy Foldover Poncho

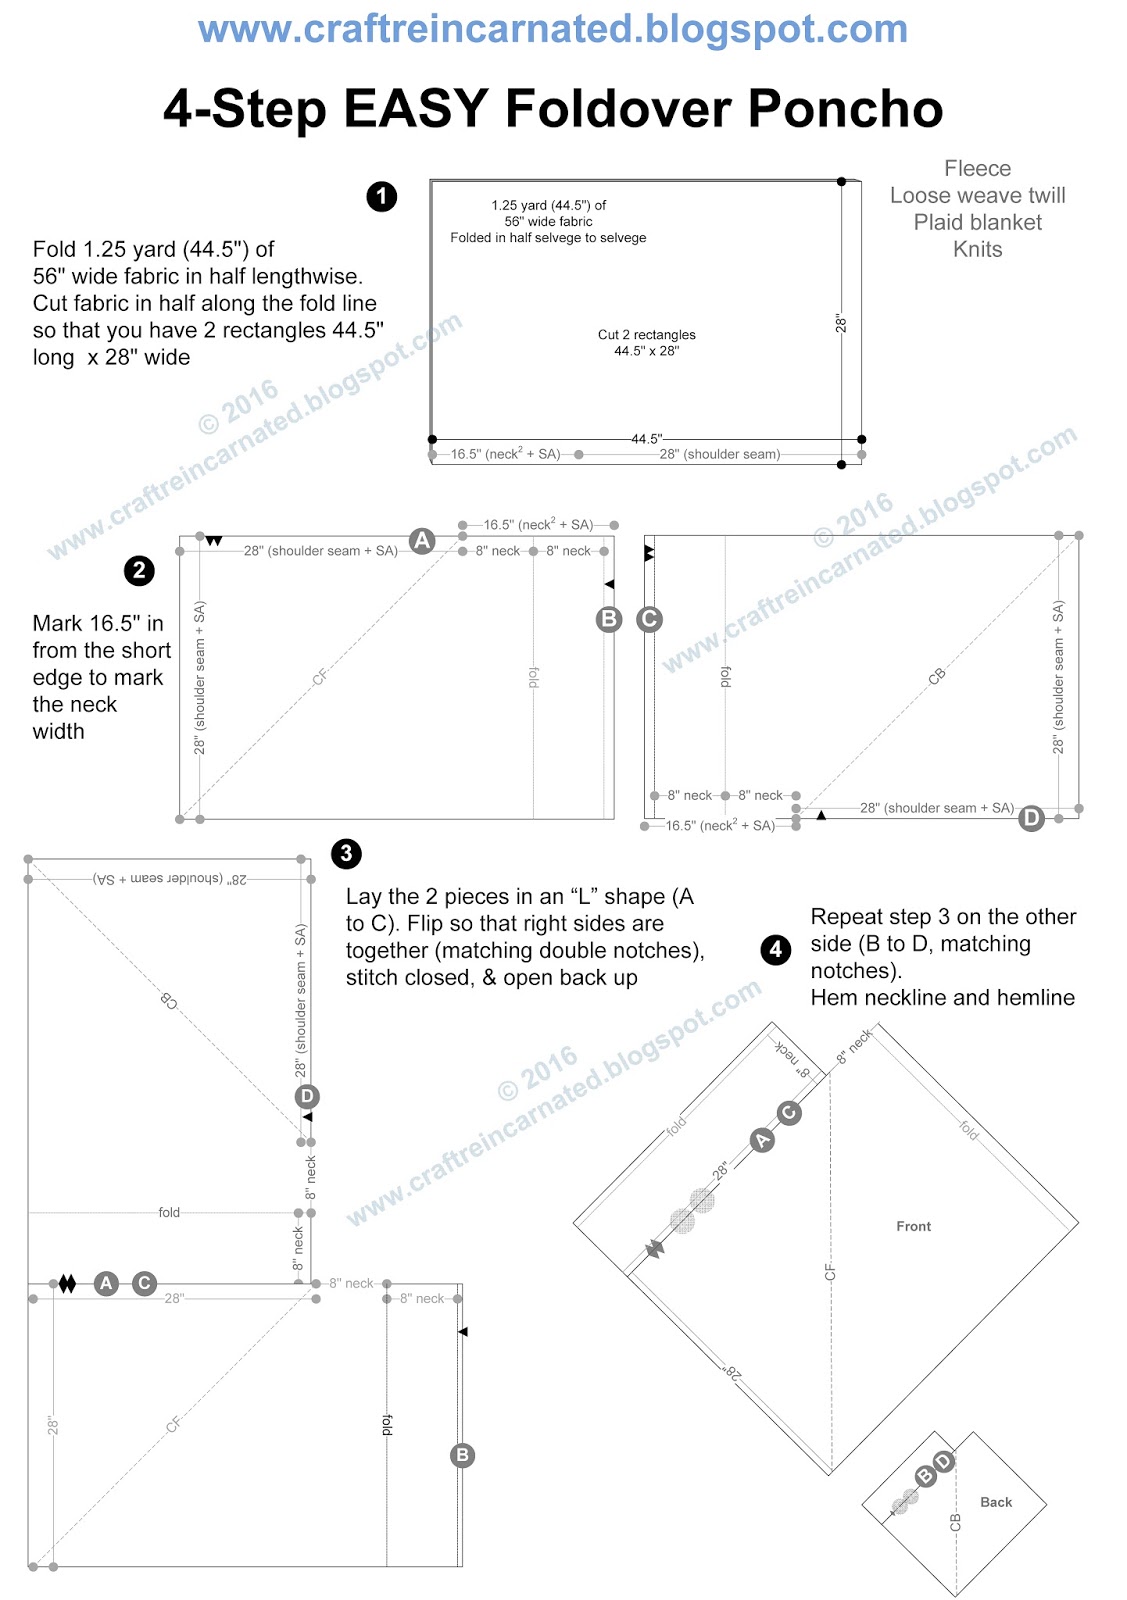
Full disclosure... I have NOT sewn this up yet. But I have laid out my measurements, drafted the blueprint and I'm ready to use up some scraps of fleece in my stash. I may have to piece some things together to get a full 1 1/4" yard of fabric.

I'll be sure to post when I'm done sewing up a sample!


Friday, June 10, 2016

Southwest T-shirt - a refashion story

This was a fun & easy little project. I normally like to refashion t-shirts, but this time I admit I bought it brand new. Michael's had Gilden t-shirts on sale for $2 - so I couldn't refuse. I bought a nice brand new 2XL shirt & refashioned it to an old dusty tie dye shirt :-)

  1. Trim down the neckband - cut just above the stitching line to hold it's shape
  2. Cut off the sleeves. I cut mine way back and I sewed my side seams in some, but you can just cut off the sleeves
  3. Tie dye your shirt. I did an accordion fold diagonally & tied it off with rubber bands, then I submerged it in a jar of Palomino Gold proactive dye from Dharma Trading - I let it sit in the jar for 24-hours. Wash & dry the t-shirt
  4. Using a grid ruler & rolling cutter, I cut 3/8" wide fringe all around the bottom (hence the 2XL shirt - I wanted the extra length)
  5. Knot the fringe. Take 2 stands & cross over 2 strands & knot them with the following 2 strands. Continue in the same direction all the way around the shirt.
Style it with your outfit & wear it!


Tuesday, January 12, 2016

No-Sew Easy Shawl

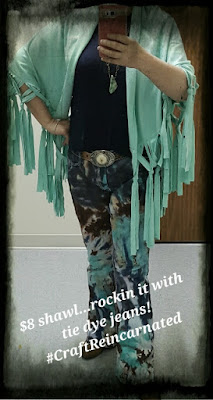
Another iteration of my Turquoise Shawl - again for about $8 - but this time it can be done with NO SEWING! Whoo hoo! I still did some sewing on mine - a hem - but totally not necessary.  Here's what I did.

Step 1: Buy Fabric

Purchase 3.25 yards of your favorite fleece (60" wide) - I found mine at Hancock Fabrics for $2.75/yd + 25% off coupon.

NOTE: You're going to use 3 yards of it, but most fabric is not on grain when you purchase it, so I always get 1/4" more for grain adjustment

Step 2: Lay out Fabric

Lay your fabric out cut edge to cut edge. This gives you a corner to work from that is 1 side fold and 1 side selvedge that is at least 54" long from the corner.

Step 3: Measure & Mark

Measure from the corner (the corner of fold and selvedge edge) out 54" and begin marking ticks in a semi circle using tailor's chalk or washable marker/pen (see image).

Step 4: Measure & Mark

Measure from the corner (the corner of fold and selvedge edge) out 30" and begin marking ticks in a semi circle using tailor's chalk or washable marker/pen (see image).


Step 5: Fringe

Start cutting 1/2" to 3/4" thick fringe pieces from the 54" line to the 30" line - through both layers of fabric. Since you are working on a curved edge, about every 6-7 pieces you will be cutting away excess fabric (see the triangular gaps shown in the image) to keep the fringe following the curved edge.
OPTIONAL: If you would like to hem the selvedge, cut away about 3/4" from the fringe area so you can roll the selvedge over & hem it. I didn't care for the selvage edge, so I hemmed mine.

Step 6: Knotting Fringe

Now it's time to tie the fringe.  You take 3 pieces (1,2,3) on one edge and place them over the next 3 pieces (4, 5, 6), and tie them to the following 3 pieces (7, 8, 9). Next you take your pieces you crossed over (4, 5, 6) and place them over pieces 7, 8, 9, and tie them to pieces 10, 11, 12. Continue this pattern all the way around.
- See more at: http://craftreincarnated.blogspot.com/2015/11/turquoise-shawl-for-8.html#sthash.yznycUMU.dpuf

This one is warmer than my knit one I did in turquoise - which works great South Texas winter :-)


Thursday, November 12, 2015

Turquoise Shawl for ~$8

I saw this luscious turquoise goatskin fringe shawl all over Pinterest last fall & just fell in love with it. First off - it took forever to track this sucker down; Secondly - when I did finally track it down it was a whooping $650! Well, I couldn't swing that on a shawl/poncho type item, no matter how luscious it is. So I set off to make my own.

No baby goats were harmed in the making of my shawl

I found this pretty poly cotton blend, turquoise, 2-way knit fabric for $4 a yard (and I think I may have had a coupon too). I bought 2 yards and stashed it in my craft room until there was time to work on it. Finally about 6 months later - I have my own shawl now.  Here's what I did:

Step 1 is to lay out the fabric so that I could mark and cut a 1/2 circle. with my fabric folded longways and my selvages matching up - I trimmed up my short edge to a nice 90 degree straight line. The width of my fabric was 60" (30" folded in half)
1. Truing up my cut edge

 To mark my half-circle, I began at my straight trimmed edge & measured out 26" from short edge to folded edge. This gives me a 1/2 circle 26" long by 52" wide.
2. Measure and mark a 26" semi circle from the folded edge

Cut out the 1/2 circle.

Now the tricky part. I knew I wanted my fringe to follow the curve, so I cut my fringe pieces in a curve. The easier way to do this would be to cut the fringe length pieces straight across - but I honestly didn't know how it would turn out sewn onto the shawl curve, so I did mine the hard way.

Using the precut circle curve as my guide - I measured 18" down from the cut curve line and marked it to cut.
3. Using the pre-cut curve as my guide. My fringe border piece measures 18" long. Stop where you can have a full 18" width of fabric & a right angle to your bottom mark.

Then I opened my fabric & continued to mark. Now, the cut piece won't go all the way around the edge of the shawl (it's too short), so you need to cut a little more.
4. Using my fringe border piece as a template to trace and cut out a bit more fringe border
I laid out my "fringe" curve on the remaining fabric & used that as a template to trace a bit more curve (image above).
5. Cutting a bit more fringe border to make sure it will go all the way around the edge of my shawl.

After I finished cutting out all my 18" fringe border pieces, it's time to sew. First, hem the straight edge of your half-circle. Second, connect your fringe border pieces at the straight lines. Third, sew your fringe border section to the half-circle section.

6. Pinning the fringe border to the shawl edge to prepare to sew.

I wanted a top-stitched, flat-feld seam look, so I trimmed one side of my seam allowance, then pressed both seam allowances to the trimmed side. Last, I top stitched it down so. (knit fabric does not fray, so no need to finish the seam allowance any further)

7. Pressing my seams to the inside & then top-stitching them
Here's what it looks like with the fringe border sewn in & all the seams topstitched (Pay no mind to the water marks or cat in the picture). The water marks are a seam where I was removing my washable marker marks. There are 3 fringe border sections, the large piece in the middle (made from using the semi circle cut line as a guide - and the two ends - where I folded out my cut border & used it to mark up the rest of my fabric (pictures 3-5)
8. The border sewn to the shawl & top stitched down


Now it's time to cut the fringe. My fringe is .5" wide at the top and .75" wide at the bottom. Because I'm cutting on a curve, your fringe pieces are more like wedges & not straight fringe. Also, there were a few areas where I removed some excess fabric triangles (probably about 4 or 5 spots) because some of the fringe pieces just didn't look nice.  I started working from the fringe border seam area out - that way I could make sure the seamed piece became it's own fringe piece.
9. Cutting out the fringe pieces


Now it's time to tie the fringe.  You take 3 pieces (1,2,3) on one edge and place them over the next 3 pieces (4, 5, 6), and tie them to the following 3 pieces (7, 8, 9). Next you take your pieces you crossed over (4, 5, 6) and place them over pieces 7, 8, 9, and tie them to pieces 10, 11, 12. Continue this pattern all the way around.
10. 3 strand fringe pieces tied together.

11. I also tried it using just 2 piece strands since my fringe is fat... didn't like it. I untied them & used the 3 pieces method.

Voila - a $8 fringe shawl!


Next time I might try the easier method of just cutting one big 1/2 circle & fringing the bottom - OR - cutting a straight fringe border & sewing that to a semi circle to see what I get.

Followup... 

I have a post where I made one of these out of fleece & did no sewing at all - worked like a charm!
http://craftreincarnated.blogspot.com/2016/01/no-sew-easy-shawl.html?m=1

Wednesday, October 14, 2015

Spoonflower Designs

I'm getting back to wanting to do some more Spoonflower designs. I'm into clothing design & Spoonflower is targeted towards quilters & crafters, but that doesn't mean I won't try to manipulate the system! :-) I'm playing around with caftan ideas like this:
I haven't purchased the fabric yet, but I'm thinking 52" Poly Crepe De Chine. 

Friday, June 12, 2015

The New and Improved Bee Bling Hat

I'm loving my bee hat v2.0. I loved the screen print of our apiary logo & the patch with the alternating blanket stitches. Then I went for the bling. My first attempt was rather meh. Just not taking it to the level I wanted. Then I was introduced to blingy Olive & Pique hats, and my vision was focused.  I went rhinestone shopping on EBay (best craft store ever) and bought a mix bag selection of sew on stones.
I had been wanting to try my new bead foundation material for a while & this seemed to be the perfect starter project. I'm not an expert beader, but I can do enough to be dangerous. Having the foundation and the rhinestones really cleaned up my beading & I love the results.
My selection of sew on rhinestones
I just made up my pattern of random stitching here


steps of the refab... removing the old beading, taping off the sections to be painted & the stenciling with gold paint

The finished result from my first attempt to the revamped version

Wednesday, June 10, 2015

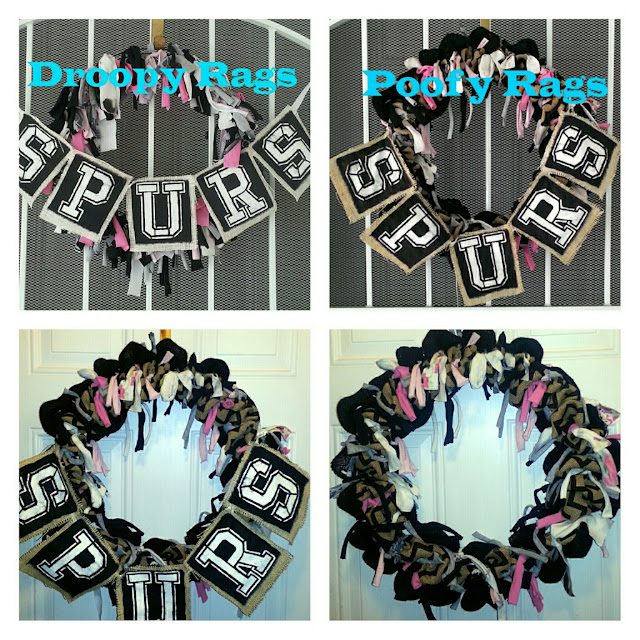
Spurs Wreath version 2.0

Ok, so you may not remember, but way back when I made a sad little Rag-a-Muffin wreath using scraps of t-shirt.
The Original Rag-a-Muffin wreath

Well, it didn't take long in the San Antonio humidity for those t-shirt scraps to go limp. So instead of a Rag-a-Muffin look, I got a drowned rat look. Not really what I was wanting. I finally got off my bum & decided to fix it. 

Step 1: I took it all off & down to the bare bones (or wire frame in this case). I also purchased some burlap ribbon from the craft store. I had a 1/2 roll of black tulle as well, but in the end I opted not to use it.

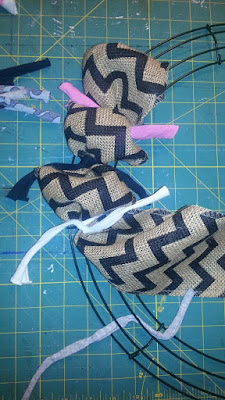
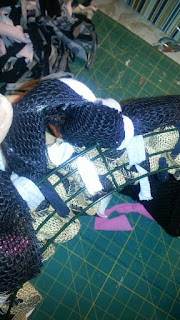
Step 2: I began by tying the chevron burlap to the center 2 rings. Being my first burlap wreath ever, I did my research, and watched some YouTube videos on how to make burlap wreaths. They all seemed to recommend a type of tuck and twist method. I really wasn't comfortable with that because it didn't seem secure, and when I tried it, mine was definitely NOT secure. But since I was going to reuse my t-shirt ties, I just decided to tie my burlap in place.  I invented my soon to be world famous "Pucker-and-Tie Method" :-)
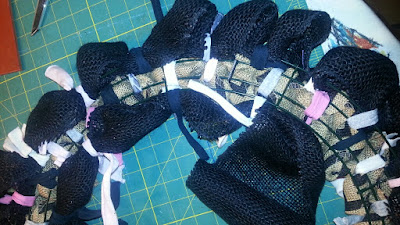
Pucker and tie method

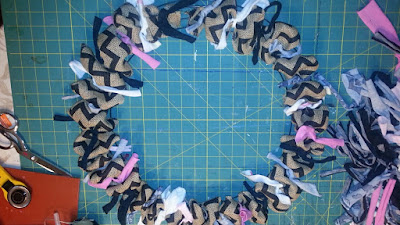
Puckered and tied all the way around (you can see the gap of the ends at the top of the photo)

Use the Pucker and Tie Method: I began by tying a short end, create a ripple or pucker with the ribbon and tie - create a pucker and tie - so on and so on until I got all the way around to my starting point and tied the last end. I had just enough ribbon to go around the wreath once. My two ends are just sitting right next to each other, which did leave a small gap, but once I was done I was able to squish them together & now you can't even see the gap. I was actually thinking that if you were to put a flower or bow or something, you would actually want that gap there.

Step 3: I began tying my solid black burlap ribbon to the inner and outer rings. I had more of this ribbon so I was able to go around both with no problem. Same method - pucker and tie.


The back of the frame looks like this
Step 4: Once I had all my burlap ribbon tied in place, I started filling in random areas with more t-shirt ties. I think my t-shirt ties were around 1" x 6" pieces (give or take on the length)
Tie extra pieces where ever you find gaps

Step 5: Hang on a wreath hanger hook
Step 6: Add my Spurs Banner Flags
All done! From droopy to poofy - in about 30 minutes (Well, 30 minutes once I had an empty frame to work from. Un-knotting all those little buggers took some time - and fingernails)


Decimal to Fraction Cheat Sheet

I've been sewing long enough that I'm usually pretty good down to the 8th mark... but I don't always remember my 16ths and they come up from time to time. Here's a handy cheat sheet that you can print & hang in your sewing & crafting space .


Wednesday, June 3, 2015

Recipe Test: Vegan & Gluten Free Snickerdoodles

This recipe form Courtney's Craftin & Cookinworks! I've done tested it out. I went off the official "Paleo" ingredients a bit, but my focus was on the vegan & GF aspect of the recipe. My modifications are in the [brackets].

Paleo Snickerdoodles:

  • 2 cup almond flour [Yup, a 16oz bag of Bob's Red Mill Almond Flour - about $10]
  • 1/8 tsp sea salt [as is]
  • 1/4 tsp baking soda [as is]
  • 4-5 tbsp coconut oil (melted) [about 2 oz of coconut oil and 2 oz of Earth Balance spread]
  • 1/4 cup honey [as is]
  • 1 tbsp vanilla extract [I was out, so I didn't use it, but I will next time]
  • mix, roll in cinnamon & flatten [as is]
  • bake at 350 for 7-8 mins [yup as is]

Tuesday, June 2, 2015

Summer Convertible Dress

Let me begin by saying - I have a lot of sundresses. I love my maxi sun dresses. In Texas summers, it is a necessity and I wear them on outings, dates, & work. So...While cleaning out my closet, I came across a Target sundress that I bought a couple summers ago, but never wear, and another Target sundress that I bought at a thrift store for a refashion.

Both dresses are made of Rayon, and both were approximately the same length & cut. I like full maxi dresses - my over 40 figure does not like a fitted look - so I never really wore my one dress. But I really liked the fabric on both. My initial idea was to do some rayon palazzo pants, but I opted for a drawstring dress instead.

I've been working on making convertible dress patterns for myself and experimenting with different suitable fabrics for the various convertible patterns. The drawstring dress is nice because it can be tied multiple ways, an works with a wide variety of fabrics (rayon, silk & knits are best). Since these dresses were both basically simple rectangles, a drawstring dress seemed most appropriate.

Here are my starter dresses:
2 Rayon Sun Dresses

  • Use a seam ripper to remove the elastic around the waist (black dress). Cut the tops off the dresses so I have 2 rectangular tubes
  • Turn the tubes inside out & cut off the sewn side seam ...so now I have 4 separate rectangles
elastic and tops removed... cut off side seams .. now laying stacked to be sewn together and truing up the seams for stitching.


  • Sew the 4 rectangles together (long sides) to make a big tube - alternating the pieces: chevron, black floral, chevron, black floral. I sewed mine using the french seam technique.

Sewing wrong sides together first  - then pressing and flipping to sew right sides together to create a french seam on the interior
  • I lined up my pieces so that I was using the hem that came with the dress. In other words, I sewed from the bottom up rather than the top down.
  • True up the top of the dress. On the Center Back seam (in this case it is the original CB of the black floral dress), open the seam about 6" down and stitch across the seam line to create a "stop" - press the seam allowance of the opening to the inside of the dress & stitch it in place. This creates a 6" deep open "V" on the dress, and gives you a place to create the tube for your drawstring to come out of.
  • Fold the top of the dress down 1 1/2" to the inside and press. Then tuck the raw edge up under about 1/4" and press again. this creates the tube for the drawstring. Stitch down your tube about 1/8" in from the inside bottom fold.

That's it. Now you can  grab a 1" wide ribbon, or strip and sew some extra fabric to create a drawstring. I had a wrap style dress already, so I just borrowed that drawstring. Depending on your body size, you will want a drawstring that is 2-3 yards long so you can twist & wrap it around your body to tie it off.

Sorry for the cheesy back yard pics - that was the best I could do at the time. I'll try to get some better pics to post, and I will also tie it up multiple ways and take some pictures for you. I styled the dress with a sweater, heels and jewelry and wore this into the office. I'm also wearing a cami-style sports bra underneath it.
From my Pinterest Board on Convertible Clothing... here's a schematic of a multi-style drawstring dress


Super easy beginner sewing. Very comfy & verstile. Always boho chic!
Stay crafty!